How to Fix a Toilet Fill Valve: Step-by-Step Guide

To fix a toilet fill valve, start by removing the lid from the tank and observing the problem as you flush the toilet. If the fill valve is the issue, use channel-type pliers to tighten the mounting nut slightly.
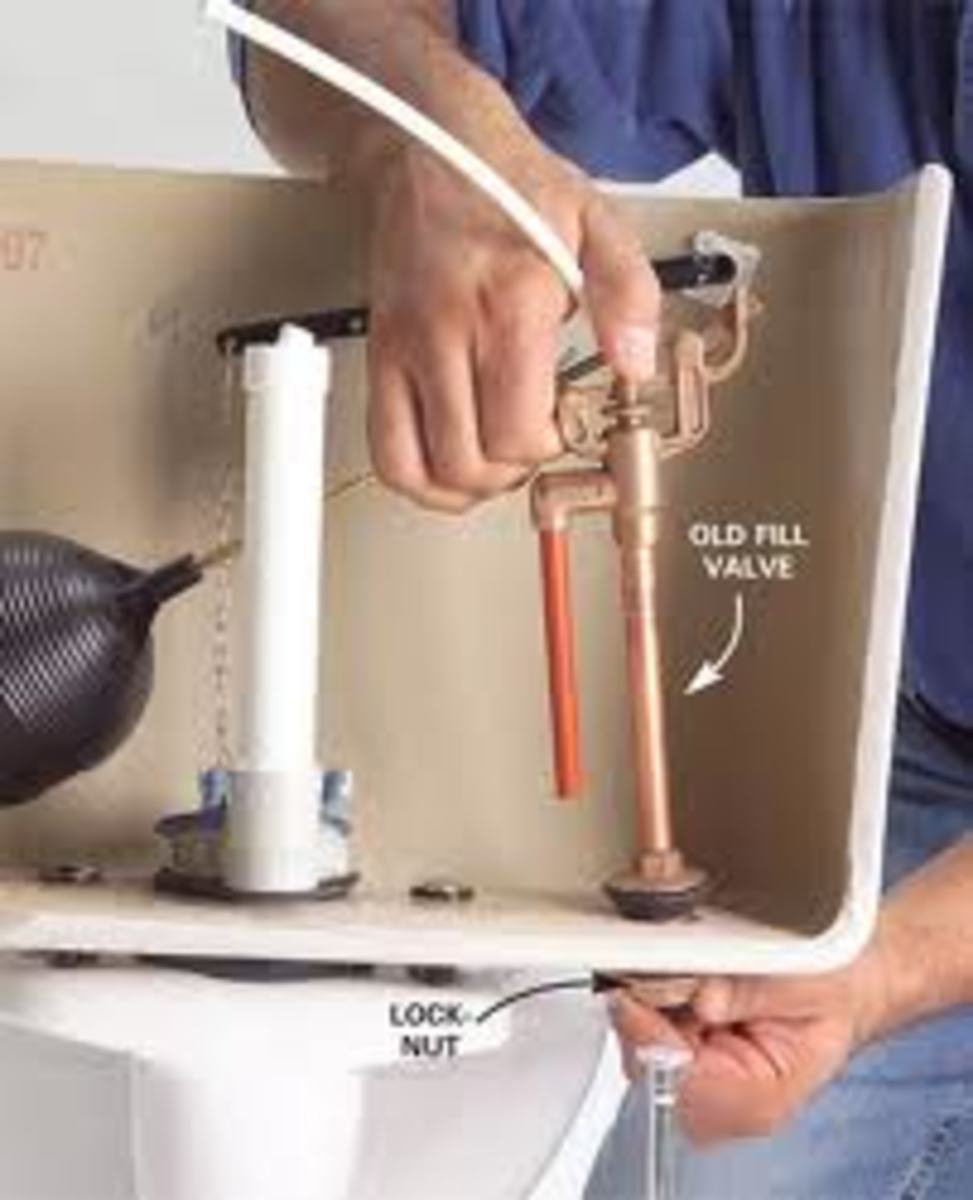
Be careful not to twist the body of the fill valve inside the tank. Alternatively, if you need to replace the fill valve, detach it and loosen the nut that secures it to the water supply line by turning it counterclockwise.
Then, simply install a new fill valve in its place. By following these steps, you can easily fix or replace a faulty toilet fill valve yourself without the need for a plumber.
Identifying Fill Valve Issues
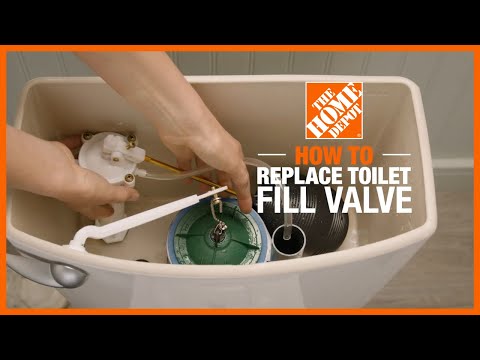
Fixing a toilet fill valve issue is essential for maintaining a properly functioning toilet. Learn how to replace a fill valve by following step-by-step instructions and tutorials on platforms such as YouTube and The Home Depot. Identify common signs such as constant running water, slow tank refill, weak or incomplete flush, water level issues, or water leakage to determine if your fill valve needs to be fixed.
| Identifying Fill Valve Issues |
| Common signs of a bad toilet fill valve |
|
| How to determine if your fill valve is the problem |
| The best way to tell if your fill valve is the problem is to remove the lid from your tank and observe what’s going on as you flush the toilet. If you notice any of the common signs mentioned above or if the fill valve is not functioning properly, it may need to be replaced or repaired. You can try cleaning the fill valve to see if it resolves the issue, but if the problem persists, it’s recommended to replace the fill valve. |

Credit: dengarden.com
Replacing A Toilet Fill Valve
|
To fix a toilet fill valve, you’ll need to follow a few simple steps. Start by removing the lid from the toilet tank and observing the fill valve while flushing the toilet. Check for any issues or abnormalities. Next, you’ll want to detach the old fill valve from the water supply line. Use pliers or a wrench to loosen the nut that secures the fill valve and turn it counterclockwise. Once the old fill valve is removed, it’s time to install the new fill valve. Place the new fill valve into the tank and tighten the mounting nut with pliers, making sure not to twist the body of the fill valve. Finally, adjust the fill valve for proper function. Turn the valve counterclockwise to unlock it and ensure it is in the correct position for optimal performance. By following these steps, you can easily fix a toilet fill valve and resolve any issues you may be experiencing with your toilet. |
Troubleshooting Fill Valve Problems
| Troubleshooting Fill Valve Problems |
| Fixing constant running water issues |
If you hear your toilet running constantly, even when it hasn’t been flushed recently, this is a clear indicator of a fill valve issue. To fix this problem, you can start by checking the water level in your toilet tank. Ensure that the water level is not too high or too low by adjusting the float valve. If the problem persists, you may need to replace the fill valve altogether.
| Resolving slow tank refill problems |
If your toilet tank takes a long time to refill after flushing, it could be due to a faulty fill valve. Start by checking the water supply line for any obstructions or kinks. Make sure the water supply is fully open. If the issue persists, you will need to replace the fill valve with a new one. Remember to turn off the water supply before removing the old valve and installing the new one.
| Fixing weak or incomplete flushes |
If your toilet doesn’t flush properly or has a weak flush, it could be due to a fill valve problem. Start by adjusting the water level in the toilet tank. Make sure the water level is set to the appropriate mark or line. If the issue persists, you may need to replace the fill valve to ensure proper flushing.
| Dealing with water level issues |
If you notice that the water level in your toilet tank is too high or too low, it could be a sign of a faulty fill valve. Adjust the float valve to the desired water level. If the issue persists, consider replacing the fill valve. Remember to turn off the water supply before starting the replacement process.
| Addressing water leakage |
If you notice any water leakage around the fill valve area, it is likely that the valve is faulty. Inspect the valve for any cracks or damage. If necessary, replace the fill valve with a new one to resolve the leakage issue.
Frequently Asked Questions Of How To Fix A Toilet Fill Valve
How Do You Know If Your Fill Valve Is Bad?
Signs of a bad toilet fill valve include constant running water, slow tank refill, weak or incomplete flush, water level issues, and water leakage. To replace a fill valve, open the toilet tank, remove the damaged part, and install a new one.
You can do it yourself if you follow instructions and have spare time. Cleaning the fill valve involves removing the cap assembly and rinsing out the valve. Proper maintenance of a Fluidmaster toilet fill valve ensures the best flush.
Can I Replace A Fill Valve Myself?
Yes, you can replace a fill valve yourself. Simply open the toilet tank, remove the damaged fill valve, and install a new one in its place. It’s a DIY task that saves you money. Visit online resources or watch tutorial videos for step-by-step guidance on replacing a fill valve.
How Much Does A Plumber Charge To Replace A Fill Valve?
A plumber may charge between $50 to $150 to replace a fill valve. However, if you have some spare time and feel confident following instructions, you can replace it yourself by opening the toilet tank and installing a new fill valve.
Remember to clean the fill valve annually to ensure optimal performance.
How Do You Clean The Fill Valve On A Toilet?
To clean the fill valve on a toilet, follow these steps: 1. Remove the cap assembly and check for debris in the valve body seat. 2. Place an inverted coffee cup over the uncapped valve body and turn the water on for 3-4 seconds, then turn it off.
Repeat twice to rinse out the valve. 3. This should be done once a year or if the fill valve won’t turn off. 4. Regular maintenance of the Fluidmaster toilet fill valve ensures optimal flushing.
Conclusion
Fixing a toilet fill valve is a simple task that can save you time and money. By following the step-by-step instructions provided in this blog post, you can easily replace a faulty fill valve and restore your toilet to its proper functioning state.
Remember to turn off the water supply, detach the old valve, install the new one, and test for any leaks. With a little patience and the right tools, you can successfully fix a toilet fill valve and avoid unnecessary plumber expenses.
Keep your toilet in good working order by periodically cleaning and maintaining the fill valve for optimal performance.


